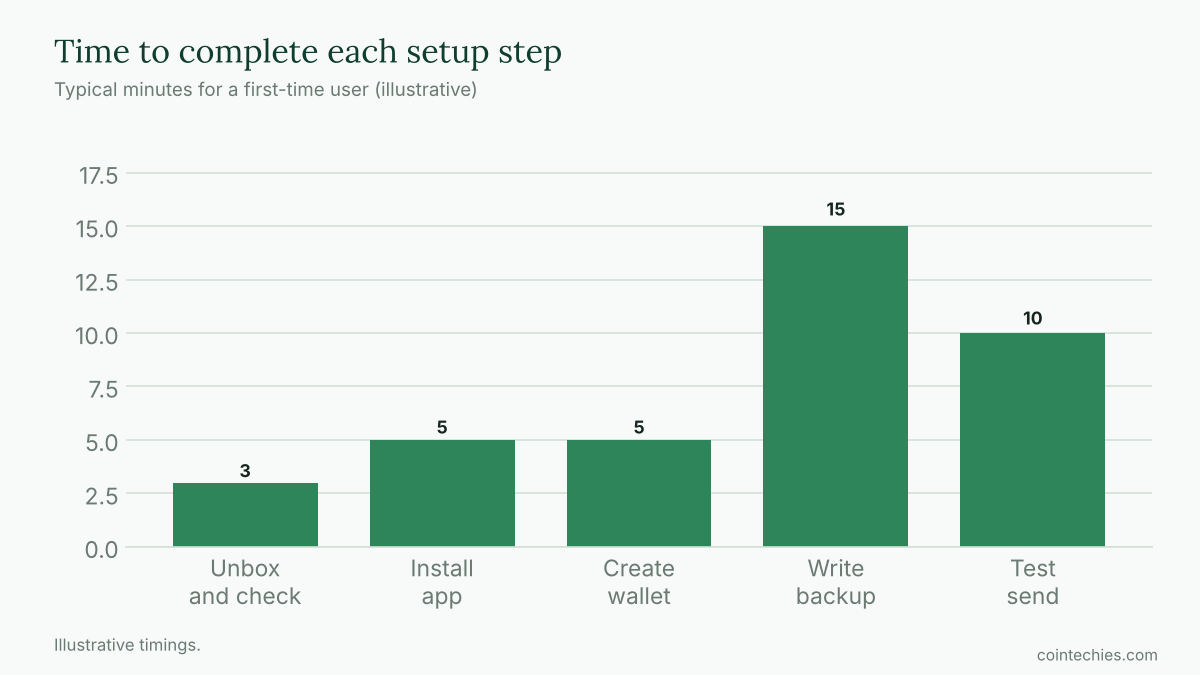
Setting up a hardware wallet takes less than an hour, and doing it carefully is the best investment you can make in your security. Follow these steps.
In this article
- Step 1: Buy from the right place
- Step 2: Inspect the package
- Step 3: Install the official app
- Step 4: Initialise as new
- Step 5: Write down the seed phrase
- Step 6: Confirm the backup
- Step 7: Update the firmware
- Step 8: Create an account and receive a test amount
- Step 9: Test recovery, if you can
- Step 10: Move the rest
- Good habits afterwards
- The bottom line
Step 1: Buy from the right place
Order directly from the manufacturer or an authorised retailer. Avoid marketplaces and second-hand sellers, since a tampered device is a real risk.
Step 2: Inspect the package
Check that the seals are intact. Inside you should find the device, a cable and blank recovery cards. If the box contains a pre-filled seed phrase or instructions to use one, stop and contact the maker: it’s a known scam.
Step 3: Install the official app
Download the manufacturer’s app from its official website, typing the address yourself rather than clicking an ad. Install it on a clean, updated computer or phone.
Step 4: Initialise as new
Connect the device and choose to create a new wallet. Never choose restore with a phrase supplied by someone else. Set a PIN that you can remember, and avoid obvious ones like 1234.
Step 5: Write down the seed phrase
The device will show 12 or 24 words. Write them in order on the paper card provided, check them twice and never photograph or type them into any device. Some people stamp them in metal to survive fire and water.
Store the backup in a secure place, ideally two copies in different locations.
Step 6: Confirm the backup
The device will ask you to confirm some of the words. This proves you have recorded them correctly.
Step 7: Update the firmware
Check that the device runs the latest official firmware, and install updates only through the official app.
Step 8: Create an account and receive a test amount
Use the app to generate a receiving address, and verify it on the device screen. Send a small test amount from your exchange first.
Step 9: Test recovery, if you can
Experienced users sometimes practise restoring on a spare device with a small balance. It proves the backup works before you rely on it for large sums.
Step 10: Move the rest
Once the test works, send the remaining coins in a few transfers. Always compare the address on the device screen with the one on your computer.
Good habits afterwards
- Keep the device in a safe place.
- Never enter the seed phrase in an app or website.
- Be cautious of emails and messages claiming to be the maker.
The bottom line
A careful setup takes patience: official sources, a clean start, a properly stored backup and a test transaction. Do it once and do it well.
This article is for educational purposes only and is not financial advice. Follow your device maker’s official instructions. Crypto assets are volatile and you can lose some or all of your investment.



Laisser un commentaire